 |
Kopy-Kat*Com! introduces our 3 fuse fuser reset kit for Xerox printers 7228 7235 7245 7328 7335 7345 7346.
The counter for the fuser is reset by replacing 3 fuses simultaneous ( a
single fuse in the 7346 version). These fuses are located on a
circuit board on the rear of the fuser. De-soldering and soldering
is required.
Though we provide instructions below notice that these are provided only to experienced technicians. By
purchasing the fuses or following the instructions below you
acknowledge full liability for both the fix and the copier itself.
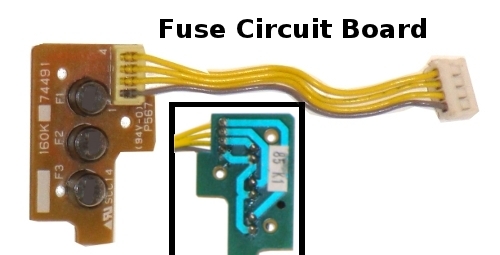
First find the fuse board it looks like the picture below notice the three fuses are F1, F2, and F3 on the board silkscreen.
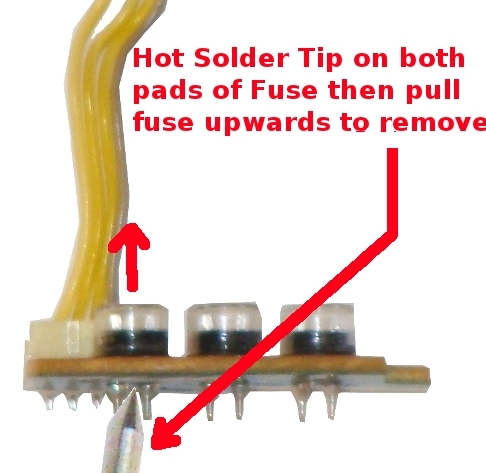
Next remove the fuses by using the soldering iron to melt the solder on the two pads on the bottom of the fuse and simultaneously pull the fuse out of the board.
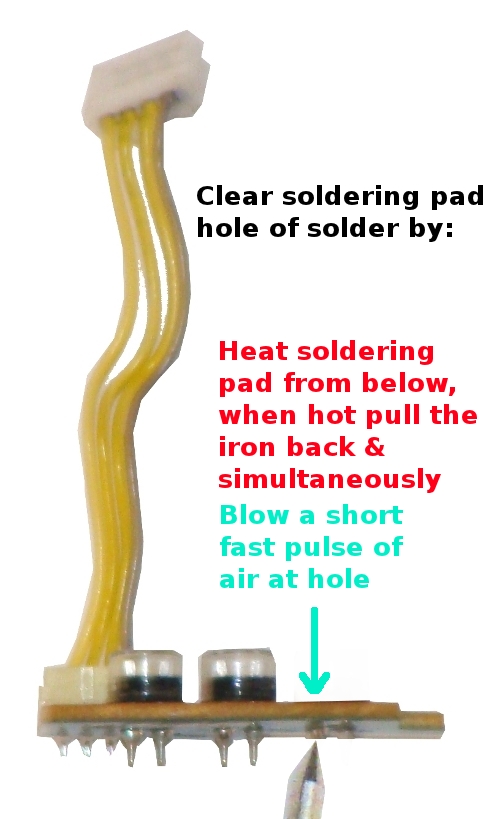
You'll want to clean
the pads of excess solder so new parts can be put through the through
holes. First heat the pad with soldering iron until hot and then
pull back the iron slightly from the pad/hole and direct a blow of short
fast air at the hole from topside with your lips about 2 inches off the
top of the board. This will blow the solder back out of the hole
making it easy to put the leads of the new fuse in.
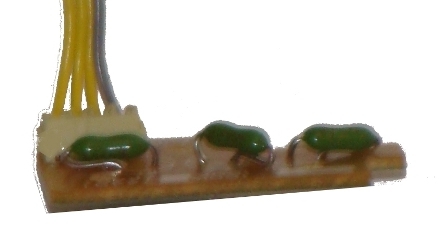
You'll now add the
new fuses and solder them into the hole/pads as shown below.
Notice you'll have to bend the parts to lay them as flat as possible to
the board. Trim the excess wire leads on bottom and solder the
fuse wire leads to the bottom pads. Make sure that the leads do
not touch each other shorting to each other or across to the nearby
fuse.
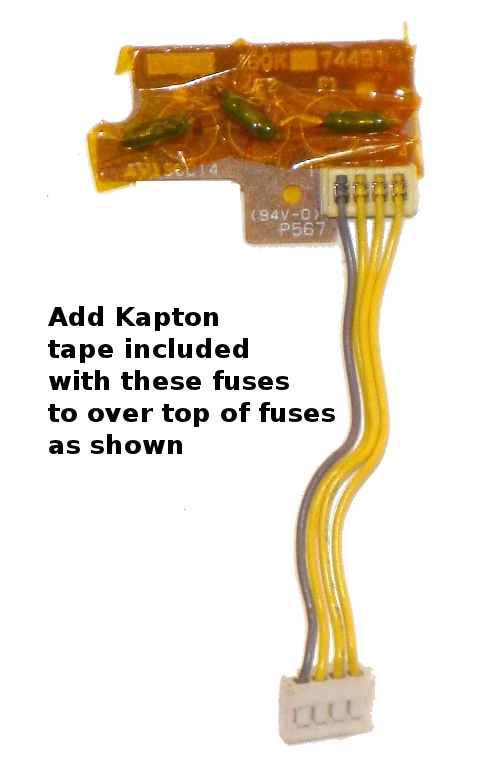
And finally take the
Kapton tape included with the fuses and cover the fuses. Trim the
excess edges of Kapton as shown below. Reinstall in the fuser
assembly. You have now reset the fuser.
Please check out all our product listings at https://www.evaluboard.com
If you have any questions please feel free to contact us: